
Most men they wear the same type of knot for their tie all their lives. It has been taken as a practice and your expectations do not come from there to start tying new knots. Now with the internet, the fact of wanting to learn and go further is in our hands, and in tutorials like this we can learn to tie various knotsIt's just a matter of trying and memorizing it with a few practices.
The history of the tie goes back to France when the king who recruited his Croatian soldiers decides to place a scarf around their necks, tied with a small knot. This symbolism and adaptation was liked and spread throughout Europe. The first to take note were the Italians who formalized this type of knot called the corvatta.
Tutorial to tie a tie in the tie
Simple tie knot

It is the quintessential knot, the one seen in almost all types of collars and that is why we are going to give you this little tutorial step by step:
- We will observe that the tie has two extensions: one narrow and the other wide.
- We will mount the wide part over the narrow one and turn it around.
- The end that we have turned we raise upwards and put it between the knot that has been formed.
- We tighten the structure delicately to form the knot as it is.
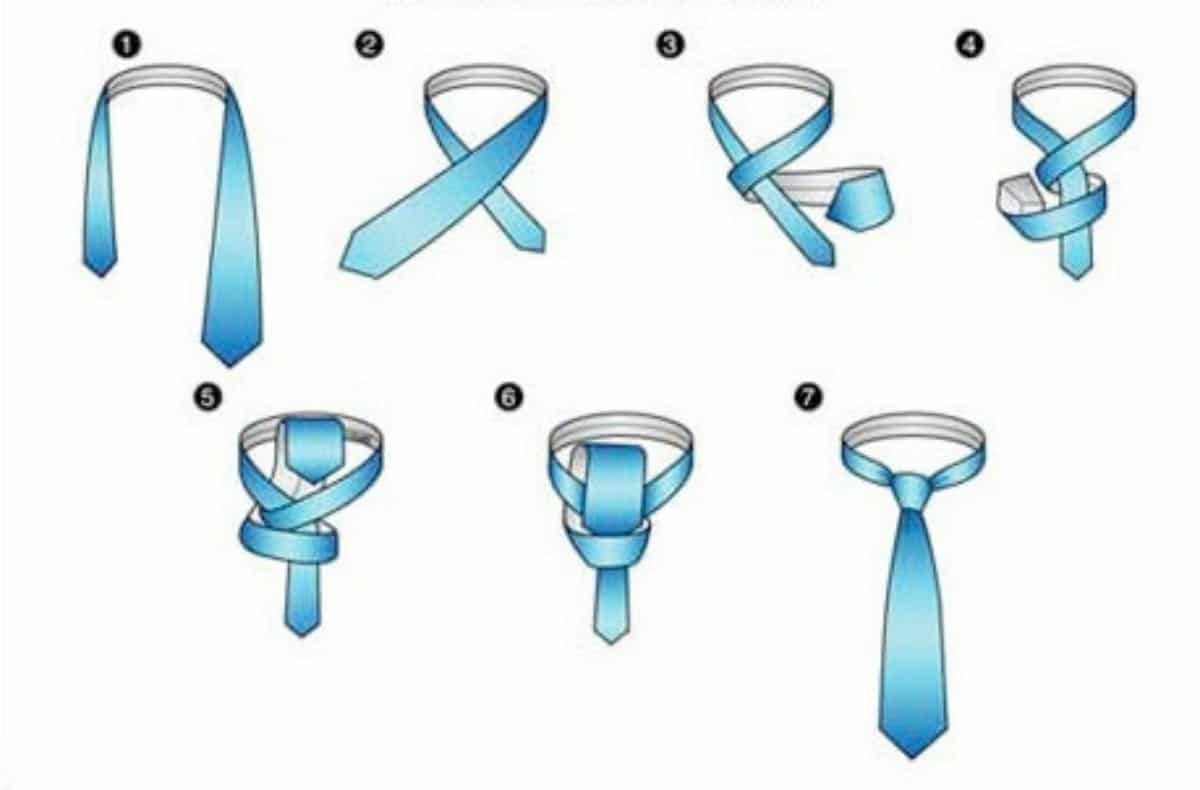
Medium Windsor tie knot
In this other tutorial the knot also has its simple shape, it only has one peculiarity, the knot is somewhat more intricate but its shape will make it much stronger and more compact. Your steps:
- We place the tie with the two ends facing each other. We will place the small end on the right and the wide end on the left.
- We move the wide end to the right over the small end. And turning it from behind to the left.
- Raise it up, pass it through the central part down (behind) and make it go through the right part.
- Turn this part to the left again, make it go up and back again and lower it again, but from the front and making it go through the knot.
- Tighten the knot by pulling down, but tighten it firmly by gently pulling up.
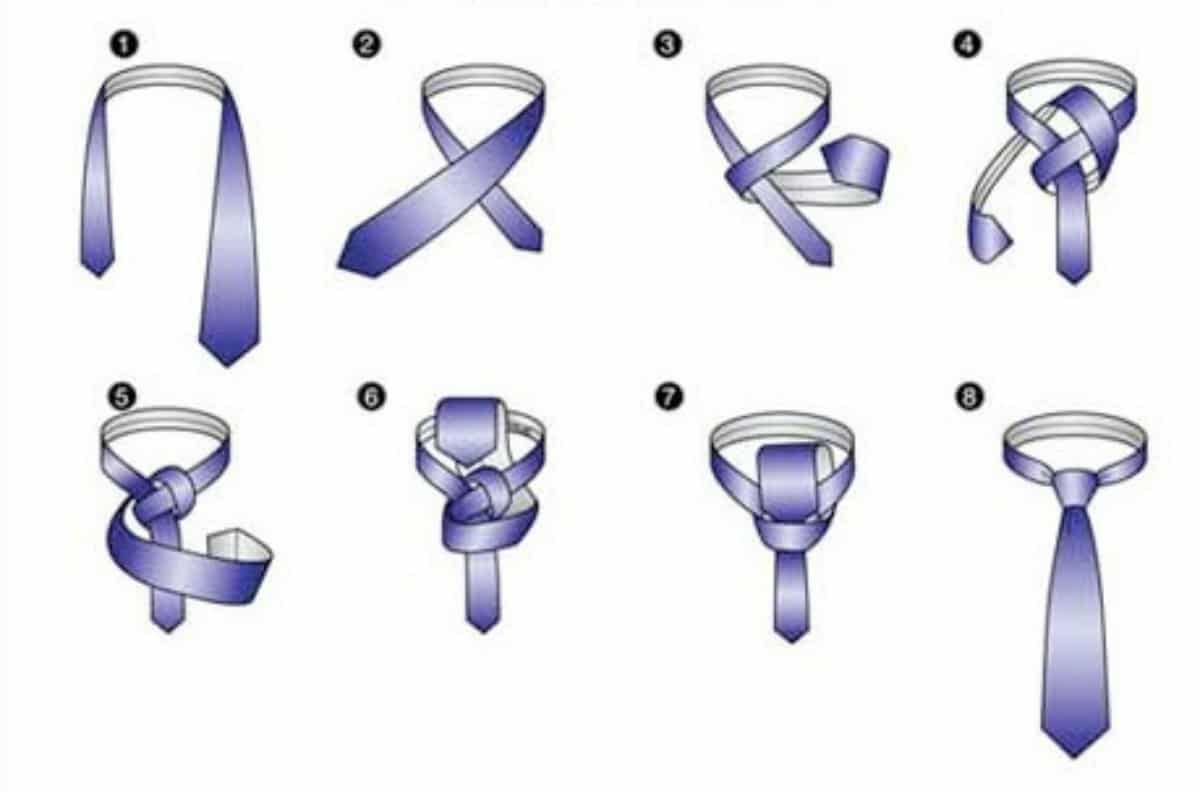
Windsor tie knot


The Duke of Windsor is the one who owes the honor to this type of knot. It is a Four in Hand knot with wide and thick ties. It ends up looking like a knot like the others, but this one has a solid, symmetrical triangular shape which goes very well with an extended neckline. Your steps:
- We place the tie with the two ends facing each other. We will place the small end on the right and the wide end on the left.
- We pass the wide end from the left to the right over the small end.
- We make it turn backwards and we pass it forward again turning it to the right.
- We throw it back again, but without raising it we turn it to the left.
- Now we do lift it up and pass it close to the knot, lower it and drop it to its left.
- Now we only have to cover the turns we have made and finish tying the knot. We twist the wide end to the right and pull it back to lift it.
- We will incline it downwards, but making it enter between the turn that we have formed.
- Tighten the knot by pulling the wide end, slide the knot up and adjust to your liking.
Trinity tie knot
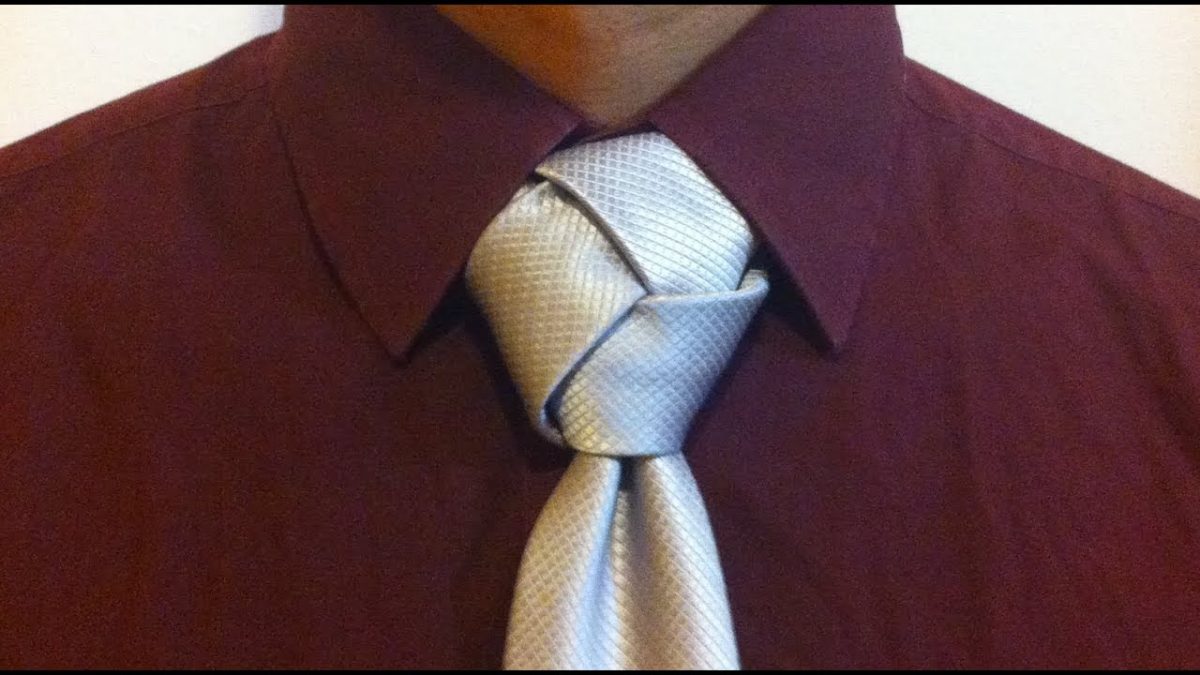

This other type of knot is different from the rest, it leaves aside the typical picture of seeing the central and correct knot, and he positions himself to make a triple knot. It is quite an innovation and It will remind us of the Celtic Triquetra knot. Your steps:
- We place the tie with the two ends facing each other. We will place the small end on the left and the width on the right, this time it is the reverse of the other copies.
- We choose the part of the narrow end and we pass it to the left over the other wide end.
- We rotate it back and up. We passed it forward and looking to the right.
- We turn it back and to the left again.
- We go up the end and we pass it backwards, forming another of the knots. By lowering it down we move it to the right.
- We turn it to the left and pass it back up inside the neck loop.
- Now we go through it down through the last part that we had turned.
- With the excess part of the end we pass it again behind and to the left.
- We turn it from the front and put it up through the third to last knot.
- With the excess piece of this end we turn it to the right side and hide it between the neck of the tie.